How to create your first repository on Github
Hello guys, how are you? 🤓
Today we'll be seeing how we can create a repository on GitHub and then put some code there!
I guess almost all of you know what git is and why it is so important. If that's not the case, o suggest to see my tip #66 first. Let's say you have a project you are working on. Even if you don't plan to much with it, it's always a good idea to keep it in a repository. This way, you'll always have access to your code on any computer, you will never lose the code, and you can track the changes that your project will go through.
Well, on GitHub we can create repositories and it's super easy! So let's go ahead and create an account on GitHub if you don't have one yet.
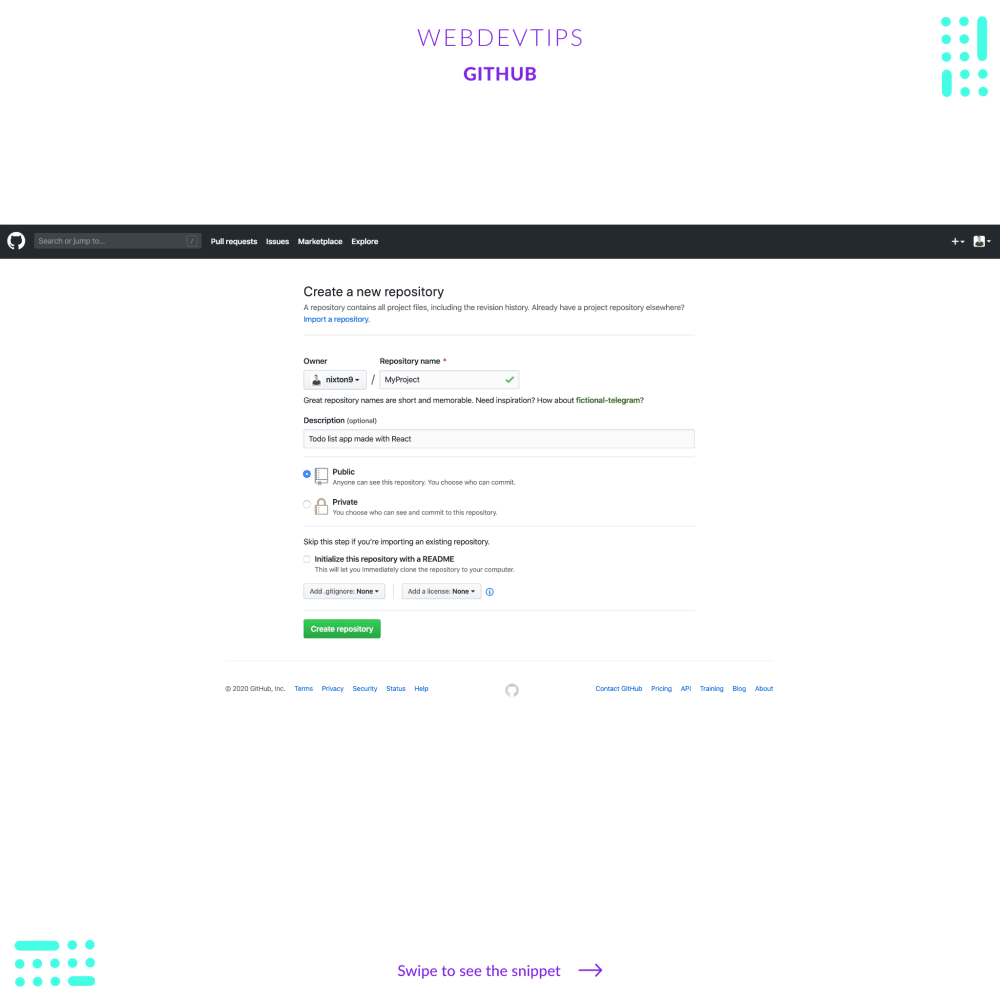
Then, on the main page, or on the 'Repositories' page, click on 'Create New'. You should see the page shown here on the second slide. Here you need to put a name for your repository (usually it should be the name of your project), add a description for it and choose if you want it to be public or private.
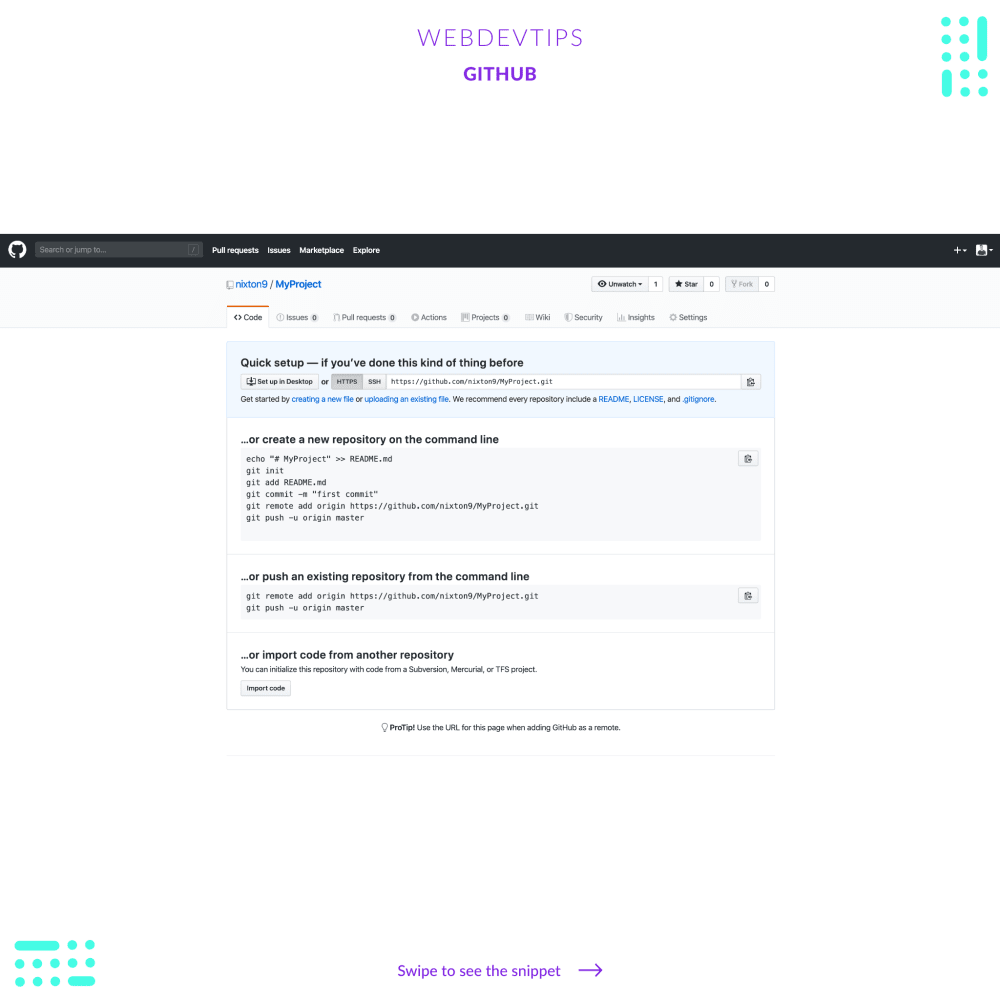
After clicking 'Create Repository' you should see the page shown here on the third slide. This means the repository has been created and it shows how you can start adding code to it. So now we just need to push our code!
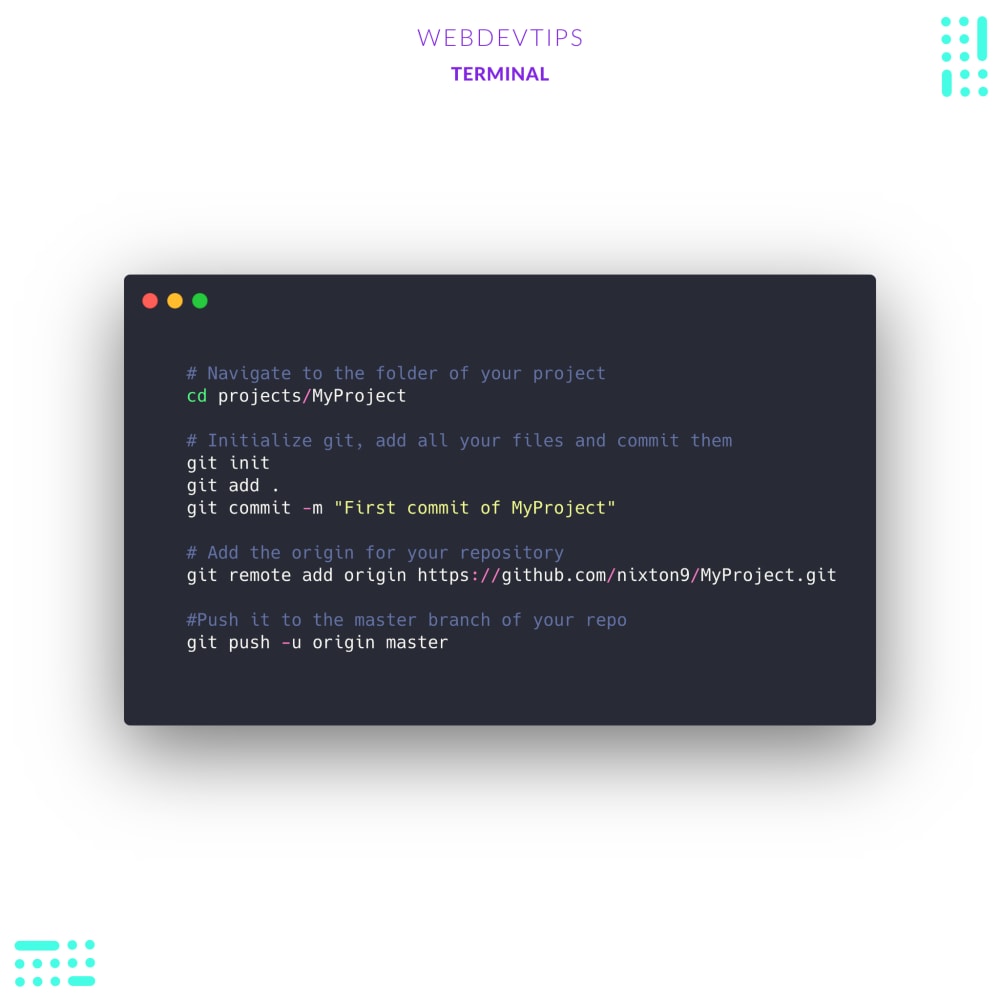
On the last slide you can see how we can do this. We navigate to our project's folder, initialize git, add and commit our files. Then we'll add the origin of our repository, and finally we just need to push what we committed to it. And it's done!
Let me know if you have any doubts 😀