Creating an awesome drag and drop effect between two lists
How are you guys? Today we will be learning how to easily create a drag and drop functionality using nothing but some HTML5 and JavaScript! For this case we'll use two lists ( 'ul' elements) and move some elements between them. After learning this, you can start applying this drag and drop functionality to whatever types of elements and scenarios you want to, the logic always remains similar.
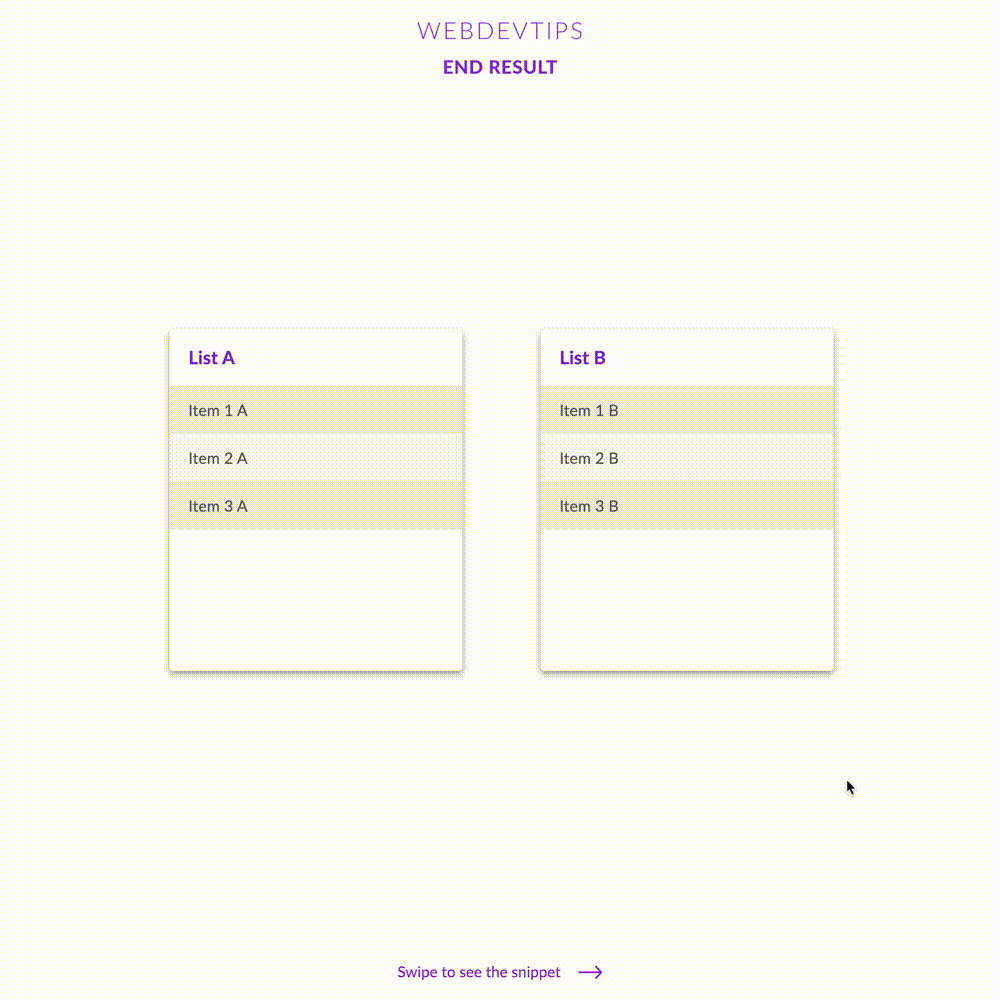
<div class="list-container">

   <h3>List A</h3>

   <ul ondrop="drop(event)" ondragover="allowDrop(event)">
       <li id="li1a" draggable="true" ondragstart="drag(event)" >Item 1 A</li>
       <li id="li2a" draggable="true" ondragstart="drag(event)" >Item 2 A</li>
       <li id="li3a" draggable="true" ondragstart="drag(event)" >Item 3 A</li>
   </ul>

</div>


<div class="list-container">

   <h3>List B</h3>

   <ul ondrop="drop(event)" ondragover="allowDrop(event)">
       <li id="li1b" draggable="true" ondragstart="drag(event)" >Item 1 B</li>
       <li id="li2b" draggable="true" ondragstart="drag(event)" >Item 2 B</li>
       <li id="li3b" draggable="true" ondragstart="drag(event)" >Item 3 B</li>
   </ul>

</div>

<script>
   function allowDrop(e) {
       e.preventDefault();
   }

   function drag(e) {
       e.dataTransfer.setData("element", e.target.id);
   }

   function drop(e) {
       e.preventDefault();
       var data = e.dataTransfer.getData("element");
       e.target.appendChild(document.getElementById(data));
   }
</script>
We'll start by creating two 'ul' elements, each one of them with some 'li' items inside them. On each 'li' we have to give it an unique 'id', set 'draggable=true' and pass the function 'drag' to the 'ondragstart' event. The 'draggable' attribute will determine if an element should be draggable or not and 'ondragstart' function will be executed everytime is element is dragged. On each of the 'ul' we have to pass two functions for the 'ondrop' and 'ondragover' events. The first event will be used to get the element that we were dragging and place it inside this one. The second event is just for preventing the default behaviour.
After having this HTML done, we can place a script tag and create the three functions we will need. They are all pretty basic. Basically all we are doing is using the dataTransfer object to save the 'id' of the element we are currently dragging. Then when we want to drop it, we just need to go get that 'id' on the dataTransfer object and with that, we can append this element to the element were we are doing the drop.
.list-container{
   width: 300px;
   height: 350px;
   margin:0 40px;
   border-radius:4px;
   box-shadow: 0 3px 6px rgba(0,0,0,0.16), 0 3px 6px rgba(0,0,0,0.23);
}

h3{
   padding: 18px 20px;
   color: #8125E2;
}

ul{
   width: 100%;
   height: 100%;
   padding:0;
   list-style-type: none;
   margin:0;
}

li{
   padding: 15px 20px;
   color:#616161;
   cursor: grab;
}

li:nth-child(even){
   background-color:#FAFAFA;
}

li:nth-child(odd){
   background-color:#EEEEEE;
}
Finally, we have some CSS that is just to get the styling we can see on the End Result. This is some pretty basic and straightforward CSS so I won't be covering it much. Hope this tip was handy and that you start using this on projects